
Assembling guide of a gypsum model:

You need the following material:
- Different spatula
- An underlayment (because of the dust you better shouldn’t do this in the best room ;))
- A cutter knife
- Scriber (you can also use a small pointed screwdriver)
- An old toothbrush
- Spackle (from the building centre)
- Commercial glue (brand doesn’t matter)
- A set quare
- If applicable an angle bracket
- Different grained sandpaper
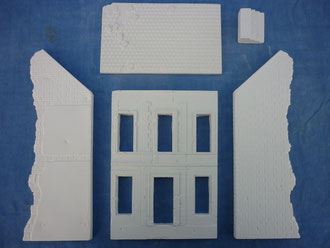
Step 1: This is a gypsum model consisting of 5 single components


Step 2: You have to grind the pieces from the back to get a clean and sleek surface. Then you have to clean the pieces from the abrasive dust.
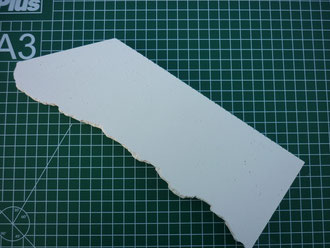
Grinded side part (back view)


Step 3: To prepare also interior damages we do some "Putzabplatzer" at the edge of the side frames.


Step 4: Now we take the gaps with a scriber....


and transfer and carve them with a ruler to the other side.....


then the individual bricks are drawn (vertical gaps).


Step 5: Now we glue the single components (all-purpose glue). Take care of angularity!


If everything is glued, let it dry.


Then we have to glue the roof.


Step 6: Now we spackle the gaps at the adhesive areas. For this we take the spackle and a small spatula.


Spackle the gaps carefully.


Step 7: After a short drying phase, we can work out the wall structure carefully, e.g retrace the gaps and remove excessive spackle.


Now you have to brush the model of the dust.


That's how it looks.


In the next "step by step" info we show you the interior fitting.